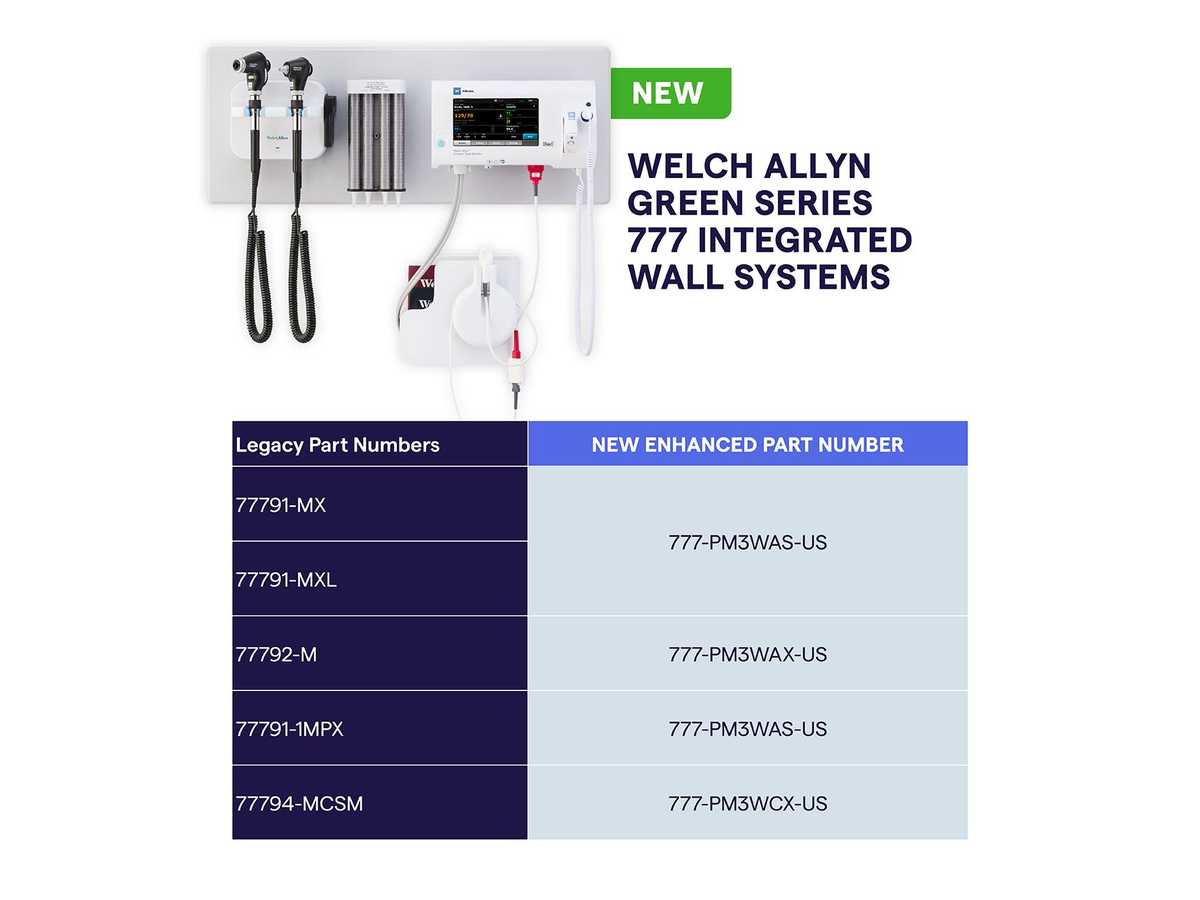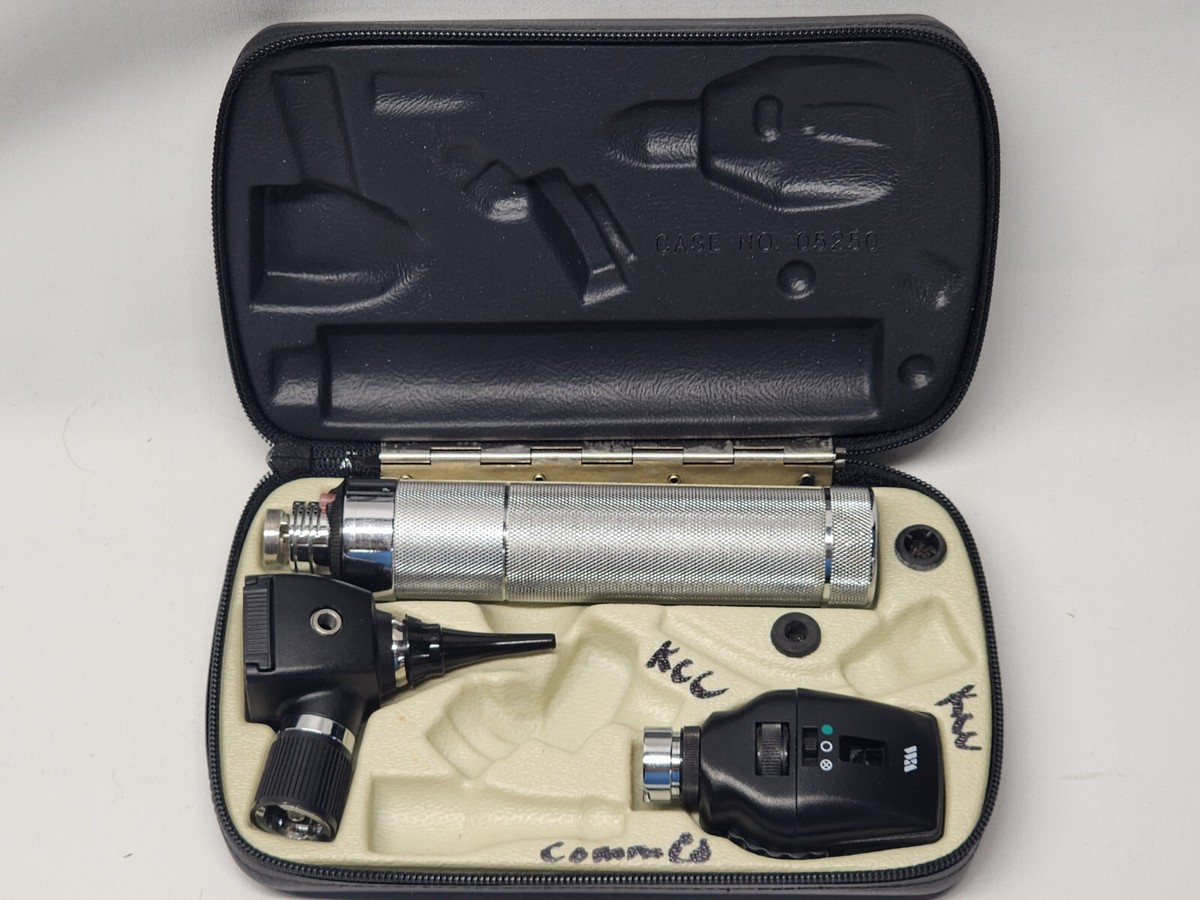
Understanding Diagnostic Set Components
Welch Allyn diagnostic sets integrate multiple examination instruments into organized, portable configurations designed for comprehensive physical examinations. A typical set includes an ophthalmoscope (standard coaxial or PanOptic), MacroView otoscope, rechargeable power handle, charging/storage system, and various accessories such as specula, insufflator bulbs, and protective cases.
For biomedical technicians responsible for maintaining these integrated systems, understanding the interdependencies between components and implementing systematic maintenance protocols is essential for ensuring clinical readiness and extending equipment lifespan.
Diagnostic Set Configurations
Common Set Types
- Standard Diagnostic Sets: Include 3.5V coaxial ophthalmoscope, standard otoscope, and rechargeable handle with desk or wall charger
- MacroView Sets: Feature MacroView otoscope for enhanced ear examination with larger field of view
- PanOptic Sets: Include PanOptic ophthalmoscope for improved fundus visualization
- Pneumatic Sets: Add pneumatic otoscopy capability with insufflator bulb attachment
- Veterinary Sets: Specialized configurations for animal health applications
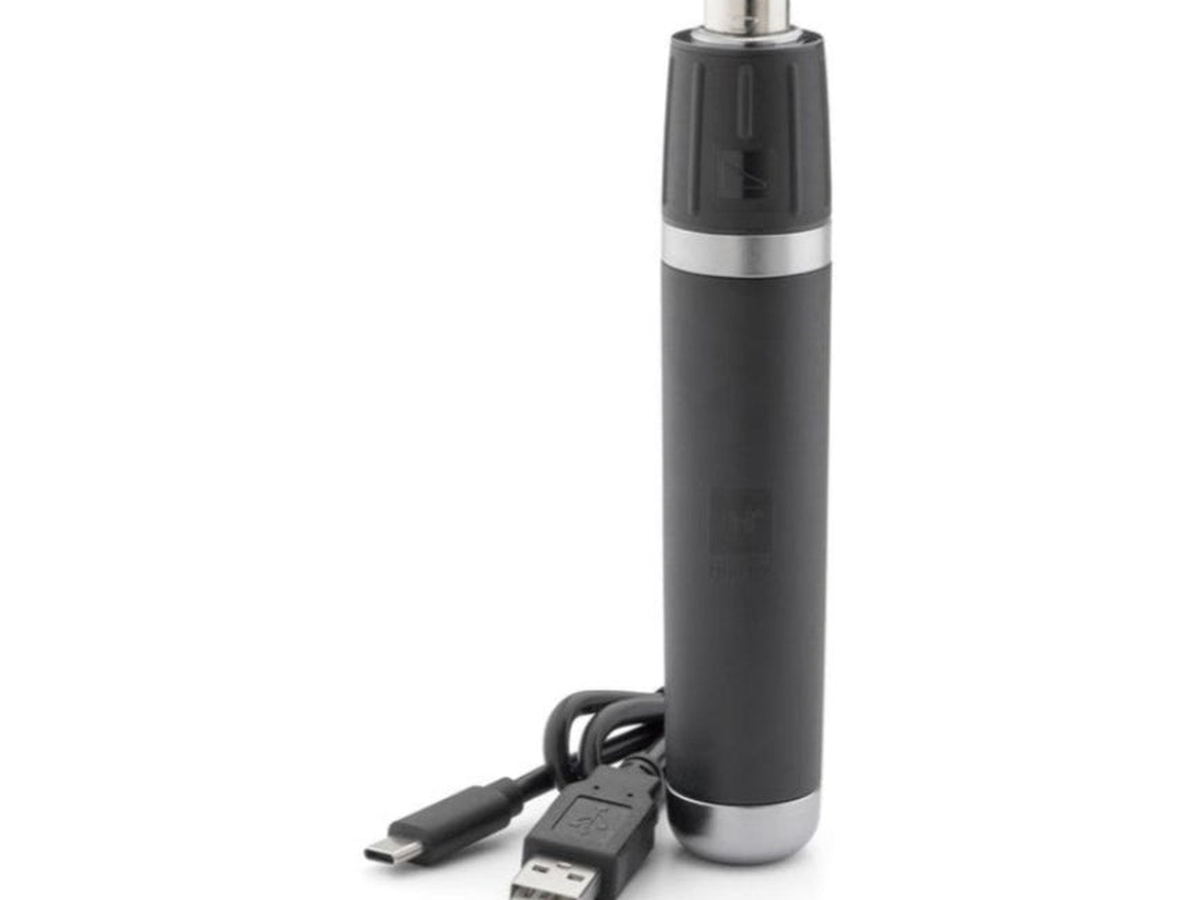
Power Handle Options
- Nickel-Cadmium (NiCad) Rechargeable Handles: Traditional rechargeable technology with memory effect considerations
- Lithium-Ion Rechargeable Handles: Modern battery technology with improved capacity, no memory effect, and longer service life
- Battery-Powered Handles: Use standard AA batteries for portable applications without charging infrastructure
Integrated Maintenance Protocol
Daily Checks (Clinical Staff)
Clinical personnel should perform these basic checks to ensure equipment readiness:
- Visual inspection for obvious damage or missing components
- Verify all instruments illuminate when activated
- Check battery/charge status indicators
- Ensure specula supply is adequate
- Wipe exterior surfaces with approved disinfectant after each patient use
Weekly Checks (Clinical Staff or Biomed Support)
- Deep cleaning of all components using appropriate disinfectants
- Inspection of charging contacts for corrosion or debris
- Test insufflator bulb function (if pneumatic otoscope)
- Verify proper seating of all components in storage case
- Check for firmware/software updates if equipped with connected devices
Monthly Maintenance (Biomedical Engineering)
Handle and Power System Inspection
- Visual Inspection: Examine handle exterior for cracks, damage to contact points, or loose components
- Battery Performance Test: Fully charge the handle, then conduct continuous illumination test. Rechargeable handles should maintain bright illumination for minimum of 60 minutes for NiCad, 90 minutes for Li-Ion
- Charging System Verification: Place handle in charger and verify charging indicator activates. Measure charge current—should be 200-400mA for standard chargers. Verify full charge achieved in <3 hours for NiCad, <2 hours for Li-Ion
- Contact Cleaning: Remove handle from instruments and clean all contact surfaces using isopropyl alcohol and soft cloth. Inspect for wear, pitting, or corrosion. Replace contacts if degradation observed
Ophthalmoscope Maintenance
- Optical Inspection: Check all lenses for scratches, coating damage, or contamination. Clean using lens cleaning solution and lens tissue only—never use paper towels or abrasive materials
- Lamp Assessment: Remove head from handle and inspect lamp. Halogen lamps show progressive darkening near end of life. LED systems should maintain consistent brightness—any dimming indicates impending failure
- Diopter Wheel Function: Rotate through full range (-25 to +40 diopters typically) verifying smooth operation with distinct detent positions. Binding or skipping indicates need for lubrication or component replacement
- Aperture Function: Cycle through all aperture selections (spot, slit, grid, red-free filter, etc.) verifying each produces correct pattern. Misalignment indicates need for aperture wheel service
Otoscope Maintenance
- Illumination Quality: Project light onto white surface at 30 cm distance. Illumination should be uniform without dark spots, rings, or color variation. Halogen bulbs show yellowing near end of life; LED systems maintain color temperature throughout lifespan
- Magnification Lens Inspection: Check lens for scratches or contamination that would impair visualization. MacroView otoscopes use complex optical systems requiring careful handling—never disassemble without proper training
- Specula Holder Verification: Test retention of disposable specula at various sizes. Specula should seat firmly without wobble but release easily when removed. Worn holders cause specula to fall off during use
- Insufflator System Test (Pneumatic Models): Attach insufflator bulb and create pressure while observing speculum opening for air movement. System should create visible movement of tympanic membrane in test subject. Leaks indicate failed seals requiring component replacement
Charging System Maintenance
- Desk Charger Inspection: Check charging contacts for corrosion, debris, or mechanical damage. Clean with contact cleaner. Verify proper handle seating in charger cradle
- Wall System Inspection: Verify secure mounting to wall. Check power supply connections. Test interlock switches that disable charging when instruments removed
- Transformer Assessment: Measure output voltage of power supply with no load—should match rated voltage ±10%. Under load (charging handle), voltage should drop <15% from no-load value
- Indicator Function: Verify charge status LEDs function correctly. Green typically indicates full charge, yellow/amber indicates charging in progress, red indicates fault condition
Quarterly Maintenance
Battery Conditioning (NiCad Handles Only)
Nickel-cadmium batteries suffer from memory effect if repeatedly partially discharged. Quarterly conditioning maintains full capacity:
- Fully charge handle per normal procedure
- Discharge handle completely by continuous operation until illumination dims significantly (typically 45-60 minutes)
- Immediately recharge to full capacity without interruption
- Document discharge time—progressive decline indicates battery degradation requiring replacement
Lamp Replacement Schedule
Even if lamps still function, preventive replacement avoids clinical failures:
- Halogen Lamps: Replace every 6 months in high-use environments (>5 patients/day), annually in moderate use. Typical rated life: 150 hours
- LED Systems: LEDs rarely fail but should be tested monthly for brightness degradation. Replace if output <80% of new LED baseline
Comprehensive Functional Testing
Perform complete operational checkout simulating clinical use:
- Install all components in functional configuration
- Test ophthalmoscope: Verify illumination at all aperture settings, verify diopter adjustment through full range, perform optical quality assessment using artificial eye model
- Test otoscope: Verify illumination quality, test specula retention, check insufflator function (if equipped), verify magnification clarity
- Test handle: Verify battery/charge capacity, test rheostat function (if equipped), verify mechanical integrity
- Document all findings in equipment maintenance log
Annual Maintenance
Complete System Overhaul
- Deep Disassembly and Cleaning: Disassemble all components to extent permitted by service procedures. Clean interior surfaces, lubricate moving parts per manufacturer specifications, replace all consumables (lamps, seals, O-rings)
- Battery Replacement: Rechargeable batteries typically require replacement every 2-3 years depending on charge cycle count. NiCad batteries show earlier degradation than Li-Ion
- Optical System Service: Professional cleaning of all optical elements including internal surfaces. For MacroView and PanOptic systems, consider return to manufacturer for optical bench realignment if performance degrades
- Contact Replacement: Replace worn electrical contacts on handles and instrument heads to ensure reliable power delivery and avoid intermittent function
- Calibration Documentation: While diagnostic instruments don't require formal calibration like audiometers or vital signs monitors, document functional verification and component replacement for quality records
Common Problems and Solutions
Problem: Intermittent or Dim Illumination
Symptoms: Light flickers, dims unexpectedly, or fails to illuminate despite charged battery
Root Cause Analysis: Most intermittent illumination problems stem from poor electrical contact between components. Contributing factors include corroded contacts, worn contact springs, or debris accumulation at interface points.
Diagnostic Steps:
- Clean all contact points using contact cleaner and soft cloth
- Inspect contacts for mechanical damage, excessive wear, or corrosion
- Test handle with known good instrument head—if illumination improves, issue is in original head
- Test suspect instrument head with known good handle—if issue follows head, confirm head failure
- Check lamp seating—improper lamp installation causes intermittent contact
Resolution: Clean or replace contacts as needed. Replace lamp if filament shows breaks or dark deposits. Replace contact springs if fatigued. For persistent issues, replace instrument head assembly.
Problem: Insufficient Battery Life
Symptoms: Handle requires frequent recharging, illumination dims rapidly during use, charge does not hold overnight
Root Cause Analysis: Battery degradation through normal aging, excessive charge cycles, or improper charging procedures (NiCad memory effect).
Diagnostic Steps:
- Perform full charge cycle using proper charger
- Measure discharge time under standard load (continuous bright illumination)
- Compare to baseline for handle type: NiCad should provide 45-60 minutes, Li-Ion should provide 90-120 minutes
- If discharge time <50% of rated specification, battery requires replacement
Resolution: For NiCad batteries showing mild degradation, attempt reconditioning (full discharge followed by uninterrupted full recharge, repeat 3 times). For Li-Ion batteries or severely degraded NiCad, replacement required. Contact Welch Allyn service for battery replacement—batteries not user-serviceable in sealed handles.
Problem: Charging System Not Functioning
Symptoms: Charge indicator does not activate, handle does not charge when placed in cradle, charge indicator shows fault condition
Root Cause Analysis: Power supply failure, corroded charging contacts, failed charge indicator circuit, or battery end-of-life condition preventing charge acceptance.
Diagnostic Steps:
- Verify power supply output voltage and current capacity using multimeter
- Inspect charging cradle contacts for corrosion or mechanical damage
- Clean charging contacts on both cradle and handle
- Test with alternate handle—if charges successfully, original handle has internal fault
- Test alternate cradle—if original handle charges successfully, cradle has fault
Resolution: Replace failed power supply. Clean or replace corroded charging contacts. For handle internal faults, return to manufacturer for battery or charge circuit repair.
Consumables and Replacement Parts
Common Replacement Parts
| Component | Typical Part Number | Replacement Frequency |
|---|---|---|
| Halogen HPX Lamp (3.5V) | 08500 | Every 6-12 months |
| Halogen Lamp (2.5V) | 06500 | Every 6-12 months |
| Disposable Specula (assorted) | 52234 series | As needed per use |
| Reusable Specula (metal) | 20000 series | Replace if damaged |
| Insufflator Bulb | 05054-200 | Every 12-18 months |
| NiCad Rechargeable Handle | 71000 series | Every 2-3 years |
| Li-Ion Rechargeable Handle | 71900 series | Every 3-5 years |
| Hard Storage Case | 05428-U | Replace if damaged |
| Soft Storage Case | 05348-U | Replace if damaged |
Inventory Management
Maintain adequate inventory of commonly replaced items:
- Lamps: Stock 2 lamps per diagnostic set (ophthalmoscope + otoscope) with 6-month buffer
- Specula: Maintain diverse size range (2.5mm, 3.5mm, 4.5mm, 5.5mm) with minimum 1-month supply based on patient volume
- Insufflator Bulbs: Stock 1 spare per pneumatic otoscope
- Handles: Maintain 1 spare handle per 10 diagnostic sets to allow rotation during service/charging issues
Storage and Transportation
Proper Storage
- Store in hard or soft cases when not in use to protect from dust, moisture, and impact
- Wall-mounted systems should be in climate-controlled environments (50-95°F, <85% relative humidity)
- Keep rechargeable handles on chargers when not in use to maintain charge readiness
- For long-term storage (>30 days), charge Li-Ion handles to 40-60% capacity to minimize degradation. NiCad handles should be fully discharged then fully charged before storage
Transportation Guidelines
- Use padded cases for transport between locations
- Ensure all components securely fastened to prevent impact damage during transport
- Avoid extreme temperatures—do not leave in vehicles during summer/winter
- Remove batteries from handles if shipping via air freight due to lithium battery regulations
Infection Control Considerations
Cleaning and Disinfection Procedures
Between Patient Use:
- Wipe exterior surfaces of ophthalmoscope and otoscope with EPA-approved disinfectant wipes (quaternary ammonium or 70% isopropyl alcohol)
- Use disposable specula when possible and discard after single patient use
- If reusable specula used, remove immediately after use and process per facility reprocessing protocols (typically high-level disinfection or sterilization)
- Do not immerse electrical components—wipe external surfaces only
Deep Cleaning (Weekly/Monthly):
- Disassemble to extent possible without tools
- Clean all accessible surfaces with disinfectant
- Use cotton swabs with alcohol to clean crevices and contact points
- Allow complete air drying before reassembly and return to service
- Never use phenolic disinfectants as these damage plastic components
Frequently Asked Questions
⚠ Safety and Compliance
Electrical Safety
- Never attempt to charge non-rechargeable batteries—explosion hazard
- Do not short-circuit battery terminals—fire risk
- Dispose of failed batteries per local hazardous waste regulations
- Verify correct voltage match between handles and heads before assembly
Infection Control
- Treat all returned equipment as potentially contaminated
- Use appropriate PPE when handling instruments between patient uses
- Follow facility-specific cleaning and disinfection protocols
- Never autoclave electronic components—use chemical disinfection only
Clinical Safety
- Remove equipment with performance issues from clinical service immediately
- Apply "Out of Service" labels to prevent inadvertent use
- Verify complete functionality after any repair before returning to clinical use
- Train clinical staff on proper use and limitations of equipment
Legal Disclaimer: This maintenance guide is for qualified biomedical technicians and clinical engineering personnel. Always consult manufacturer service manuals and follow institutional policies. Improper maintenance may compromise patient safety and void equipment warranties.